

Simple Voice Chat is an essential proximity voice chat mod for Minecraft Java Edition. Unlike external solutions like Discord, it integrates communication directly into the game world.
Sound volume and direction adjust in real time based on the distance and position of other players, radically changing immersion and the roleplay experience.
This guide walks you step by step through the installation, configuration, and optimization of the mod, whether you are a server administrator or just a player.
Introduction to Simple Voice Chat
Simple Voice Chat is an open source project widely praised by the Minecraft community. Its strength lies in its lightness and versatility, which allows it to fit perfectly into survival servers, SMPs, and technical servers.
Main features
Proximity chat, sound gradually decreases as you move away from a player.
3D spatial audio, the voice comes from the exact direction where the character is located.
Voice groups, the ability to create private channels to communicate over unlimited distance.
Customization, choice between push to talk mode or open mic with activity detection.
Integrated interface, a full in game menu to manage microphones, speakers, and volume levels.
Technical requirements
Compatibility
Edition, compatible only with Minecraft Java Edition. The mod does not work on Bedrock or Windows 10 Edition.
Supported mod loaders, Fabric, Forge, NeoForge and Quilt.
Server resources
The mod is optimized so as not to affect server processing performance.
CPU and RAM, negligible usage.
Network, a stable connection is required, with voice traffic passing through a dedicated UDP port.
Server side installation and configuration
Step 1, Download
Always download the .jar file from an official source to ensure security and compatibility.
The recommended platforms are CurseForge and Modrinth.
Step 2, Standard installation
Fully stop your server.
Place the mod file in the \/mods.
Restart the server so the configuration files are generated automatically.
Step 3, Open the ports, crucial
Simple Voice Chat uses the UDP protocol, separate from the TCP 25565 port used by Minecraft.
By default, the most commonly used port is 24454.
You must change this port to use a port between 31000 AND 32500, because the other ports are not open.
Step 4, Fine tuning
Go to the world\/serverconfig or config\/voicechat folder to edit the voicechat-server.properties.
max_voice_distance lets you define the maximum range of voice chat, for example 48 blocks.
voice_quality sets the audio compression quality. A value of 4 offers a good quality performance trade off.
allow_groups enables or disables the creation of private voice channels.
Client side installation and use
Installation
Each player must install the mod locally with exactly the same version as the one used on the server.
Install the corresponding mod loader, for example Fabric.
Place the mod in the .minecraft\/mods.
Launch the game.
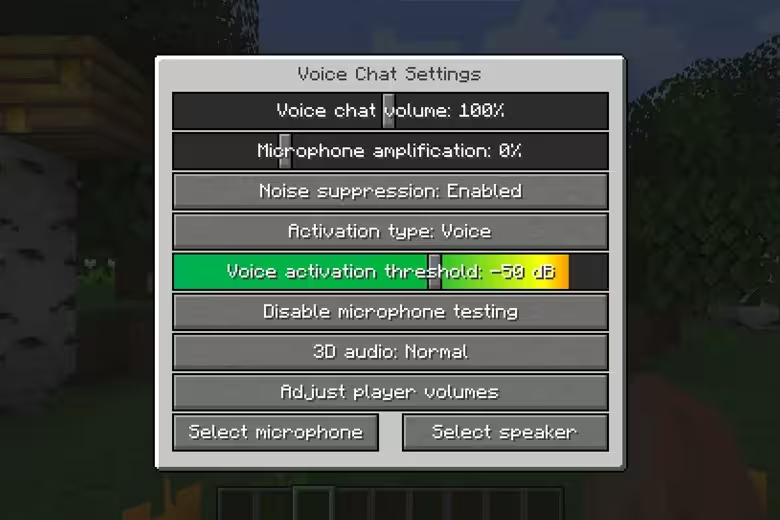
In game use
Once connected to the server, press the default V key to open the configuration menu.
Test your microphone and select the correct audio devices.
You can adjust each player's volume individually directly from the list.
Common issues and solutions
Crossed out microphone icon
The UDP port is not open on the server side, or the client cannot connect to it.
Choppy or poor quality voice
The problem is usually related to network congestion. Reduce the voice_quality value in the server configuration.
Other players cannot hear me
Check in the menu accessed with the V key that the correct input device is selected and that mute mode is not enabled.
Conclusion
Simple Voice Chat is now the most efficient and immersive voice chat solution for Minecraft Java Edition.
Its ease of use for players and its server side reliability make it an essential standard for any modern multiplayer server.